
Cacti is a free and open-source web-based network monitoring and graphing tool that helps to track your device’s network performance in almost real-time.
Cacti gathers performance metrics from servers and network devices and graphs and stores them for reporting and historical analysis.
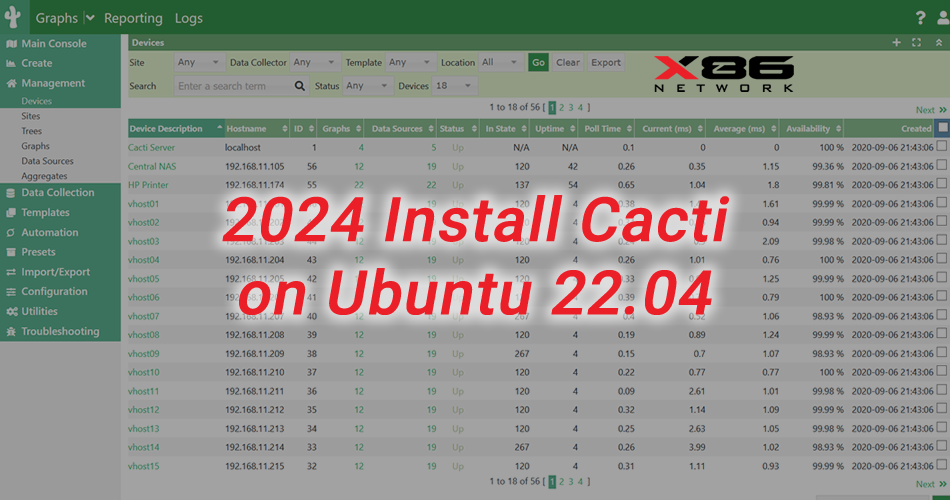
Here, we will see how to install Cacti on Ubuntu 22.04.
Requirement (from Cacti website)
- Web Server that supports PHP e.g. Apache, Nginx, or IIS
- Build environment when using spine (gcc, automake, autoconf, libtool, help2man)
- RRDtool 1.3 or greater, 1.5+ recommended
- PHP 5.4 or greater, 5.5+ recommended
- MySQL 5.6 or MariaDB 5.5 or greater
Here is our setup:
PrerequisitesFirst, update the repository index
Install Apache & PHP ExtensionsInstall the required PHP extensions, nano and cron
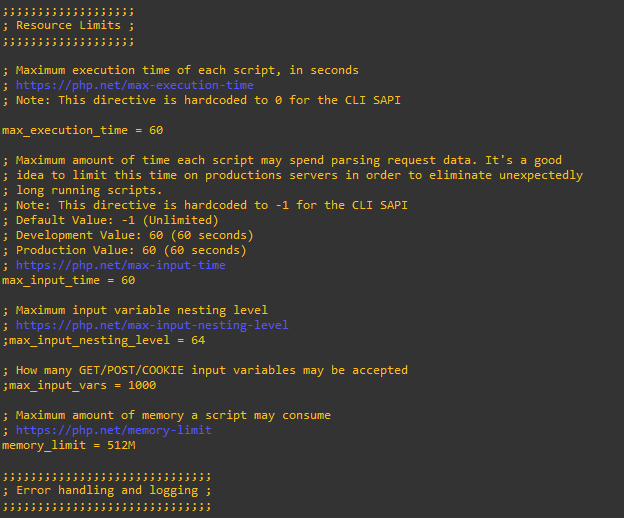
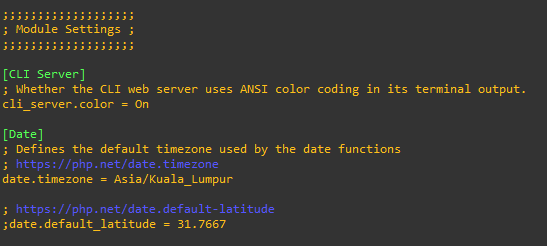
PHP Settings for Cacti
Cacti necessitates the following values in the php.ini files. It might be necessary to modify these values for both the web service located at /etc/php/8.1/apache2/php.ini and the Command Line Interface (CLI) located at /etc/php/8.1/cli/php.ini, provided your system operates on PHP version 8.1.
Search and uncomment accordingly for both files below:
- date.timezone = Asia/Kuala_Lumpur
- memory_limit = 512M
- max_execution_time = 60
Install MariaDB DatabaseMariaDB, originating from the MariaDB Foundation, is an open-source database server. It represents a branch derived from the widely known MySQL database management system.
sudo apt install -y mariadb-server mariadb-client
sudo mysql_secure_installation
Output:
- Enter current password for root (enter for none): << Just Press Enter
- Switch to unix_socket authentication [Y/n] N<< Disable Unix Socket Authentication
- Change the root password? [Y/n] Y<< Set MariaDB root password
- New password: xxx<< Enter new MariaDB root password
- Re-enter new password: xxx<< Re-enter new MariaDB root password
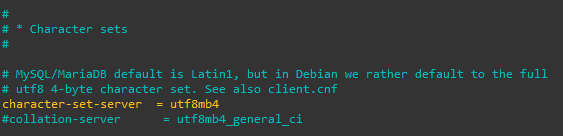
Tune Database for CactiTo install Cacti, you’ll need to adjust several MariaDB settings by modifying the configuration file.
Add/update the below settings in the [mysqld] section, and uncomment collation-server as shown below.
collation-server = utf8mb4_unicode_ci
max_heap_table_size = 128M
tmp_table_size = 64M
join_buffer_size = 8M
innodb_file_format = Barracuda
innodb_doublewrite = off
innodb_large_prefix = 1
innodb_buffer_pool_size = 1024MB
innodb_flush_log_at_timeout = 3
innodb_read_io_threads = 32
innodb_write_io_threads = 16
innodb_io_capacity = 5000
innodb_io_capacity_max = 10000

Install SNMP for Cactiand restart MariaDB and Apache services.
Install Cacti on Ubuntu 22.04Create Database for Cacti
To grant access to the mysql.time_zone_name table for the database user (cactiuser), you should begin by importing the mysql_test_data_timezone.sql file into the mysql database.
Grant permission to the database user (cactiuser).
Download Cacti PackageFirst, use the wget command to download the most recent version of the Cacti package.
Afterward, utilize the tar command to extract the Cacti archive, and relocate the extracted files to the /var/www/html directory.
And then import the default Cacti database data to the newly created database.
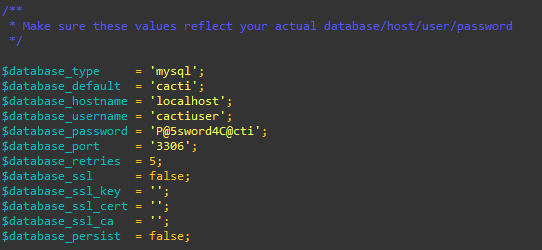
Then, make the changes according to your requirement.
Finally, restart the Apache service.
You might also have to adjust the ownership of the Cacti directory to the Apache user (www-data).
Add the following entry in the cron to allow Cacti poller to poll every five minutes.
echo “*/5 * * * * www-data php /var/www/html/cacti/poller.php > /dev/null 2>&1” | sudo tee /etc/cron.d/cacti
Setup cactiVisit the following URL to begin the installation of Cacti.
http://Your.IP.Address/cacti
Login to Cacti to initiate the setup.
The default username and password are admin.